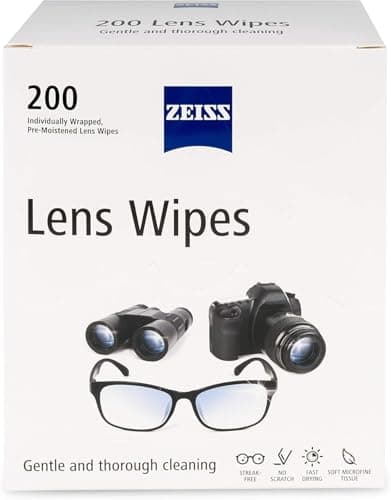
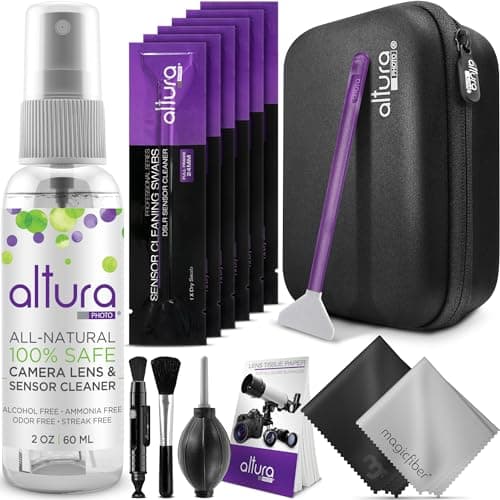
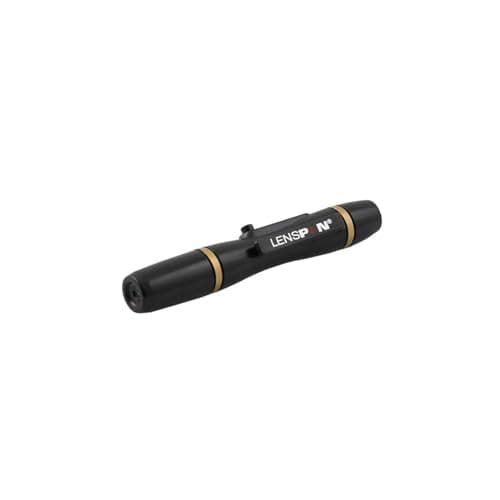
The short answer: never wipe a dry lens. Grit is what scratches coatings, and a cloth dragged across a dry front element turns loose dust into sandpaper. The sequence is always air first, then a soft brush, then — only if a mark is still there — something damp, worked from the centre outwards in a spiral with no pressure. For fingerprints and finger oil, a LensPen's carbon tip is the one tool designed for exactly that job; for greasy smears and screens, an individually wrapped pre-moistened wipe is the simplest honest answer. Most lenses never need more than the first two steps.
Start with a question almost nobody asks: does the mark actually affect your photos? Front element dust does not. A speck of dust on the front of a lens is wildly out of focus and covers a vanishing fraction of the aperture, so it reduces the light reaching the sensor by an amount you cannot measure in an image. Photographers have been known to clean a front element weekly for twenty years and to put more wear into the coating than the dust ever would have.
What does affect your photos is anything that scatters light across the whole frame: fingerprints, water spots, sea spray, hairspray, and the greasy film that builds up on a lens that lives in a bag. Those cause flare, veiling haze and a soft, low-contrast look when you shoot towards a light source. That is worth cleaning. Three specks of dust are not. If you are chasing fixed dark blobs in the same place in every frame, that is not the lens at all — see how to clean a camera sensor.
The order of operations
Step 1 — air. Hold the lens face down and squeeze a hand blower across the glass from a couple of centimetres away, so gravity takes the dust away from the element rather than back onto it. Never canned or compressed air: the propellant can spit liquid onto the coating, and the pressure can drive grit into the gap between the element and the barrel. This step alone finishes the job most of the time and it is the only step with no risk at all.
Step 2 — a soft brush. A retractable lens brush, or the brush end of a LensPen, lifts the particles air did not move. Brush from the centre outwards so you sweep grit off the edge of the element rather than around the middle of it. Keep the brush capped between uses, and never touch the bristles with your fingers — finger oil on a brush turns it from a dust remover into a grease spreader, which is the most common way this tool goes wrong.
Step 3 — something damp, only for marks that survived steps 1 and 2.This is where the choice of tool matters. For a fingerprint, a LensPen's carbon compound tip is purpose-built: it is a non-liquid cleaner that lifts finger oil without pooling anything at the element edge. For a broad greasy film or a screen, a fresh pre-moistened wipe is easier and more consistent than a bottle and a cloth. Either way, work in a spiral from the centre of the element to the rim, with the weight of the tool and nothing more.
Step 4 — stop. If a mark has survived a careful damp pass, do not keep going with more pressure. Repeated pressure is how coatings get polished off, and a mark that will not lift is usually either inside the lens or etched into the coating already, neither of which is a cleaning problem.
How to clean a lens without lens cleaner
You can, and the method people use is breath — fog the element with a short exhale and wipe immediately with a clean microfibre cloth, centre outwards. It works because condensation is distilled water with nothing dissolved in it. Two honest caveats: breath carries whatever is in your mouth, so it is for a quick field fix and not a routine, and it does very little against oil, because water does not dissolve grease. A LensPen's carbon tip needs no liquid at all and is the better no-cleaner answer.
What never to use, regardless of what a forum says: household glass cleaner (ammonia attacks coatings), alcohol wipes not made for optics, paper towel and tissues (wood fibre is abrasive and most tissue carries lotion), a shirt tail, an eyeglass cloth that has lived loose in a pocket collecting grit, or a microfibre cloth that has been through a wash with fabric softener — softener leaves a film and the film is what you are trying to remove.
Which tool for which mark
Every row below is a product this site already ranks, with manufacturer-listed contents, so you can see what each one is actually for. The single rule that matters: lens tools and sensor tools are not interchangeable in either direction.
| Tool | Listed contents | Best at | Use on a sensor? |
|---|
| LensPen NLP-1 | Retractable soft brush one end, carbon compound cleaning tip the other, non-liquid | Fingerprints and finger oil on lens and viewfinder glass | Never — the manufacturer says lens and viewfinder glass only |
| Zeiss Pre-Moistened Lens Wipes | 200 individually wrapped, pre-moistened, ammonia-free wipes | Greasy films and smears on lens, filter and screen glass | Never — wipes are for lens and screen glass |
| Altura Photo Camera Cleaning Kit | Blower, brush, microfibre cloths, cleaning solution, sensor swabs, zippered case | Covering steps 1 and 2 in one box, plus a bottle and cloth for step 3 | Its swabs are 24mm full-frame width — too wide for an APS-C sensor |
A hand blower is the one tool we would buy before any of the others, and the reason it is not ranked on its own above is honest: the Giottos Rocket Air Blaster's listing has had no buyable offer since our dead-listing audit, and we do not put a buy button on something you cannot buy. The Altura kit includes a blower, and the full ranking is on best camera cleaning kits.
Dust or fungus inside the lens
Hold the lens up to a bright light, look through it from the back, and you will usually see some dust suspended between the elements. That is normal in every lens that has ever been zoomed — a zoom breathes air through its barrel as it moves — and in all but extreme cases it has no visible effect on an image, for the same out-of-focus reason front-element dust does not. There is no home method to remove it. Opening a lens means re-centring and re-collimating elements afterwards, which is a service-centre job.
Fungus is the one you act on. It looks like fine white or grey threads, a spiderweb or a frost pattern rather than discrete specks, and it grows — if it looks different from a photo you took of it a month ago, it is fungus. It etches coatings permanently as it feeds, and it can spread to other lenses stored in the same humid bag. A lens with active fungus needs professional cleaning or replacing, and it should not go back in the bag with healthy glass in the meantime. Prevention is dull and effective: store lenses somewhere dry, not sealed in an airtight case with trapped humidity, and give a bag that has been rained on a chance to dry out with the lenses out of it.
The habits that mean you clean less
Keep a lens cap on, or keep a filter on. A clear or UV filter takes the fingerprints, the sea spray and the risk, and a filter is the cheapest glass in your bag to replace. This is a genuine disagreement among photographers — a filter adds two more air-to-glass surfaces and, on a cheap filter, visible flare — and our position is simple: a good filter on a lens that lives outdoors is worth it, a cheap filter on a lens that lives indoors is not. The filters explained guide covers which types actually do something.
Use the hood. A lens hood exists to block stray light, but it also means the front element is recessed, which is why hooded lenses pick up fewer fingerprints and survive more knocks.
Caps on both ends, in the bag. A rear cap left off is a dust source you carry around with you, and it points straight at the one surface that does affect your images. If your bag has fabric dividers, vacuum the inside of it occasionally — a camera bag is a dust reservoir, and a lens you cleaned on Monday is breathing it on Tuesday.
How often should I clean a lens?
When a mark is affecting your images, and not on a schedule. Every clean is a small amount of mechanical contact with a coating, so cleaning a lens that does not need it is pure downside. The useful test takes ten seconds: shoot a frame towards a bright light with the sun just outside the frame. A clean lens gives you contrast and a defined flare; a greasy one gives you a washed-out, milky haze across the whole image. That is the state worth fixing.
Can I clean a lens on a phone or a filter the same way?
Yes — a phone camera window, a filter and a viewfinder are all just coated glass, and the same air-brush-damp sequence applies. The one difference is pressure: a phone window is tiny and a filter is thin, so there is even less reason to press. Wipes are usually the easiest tool for both, and the same prohibition applies to all of them — nothing designed for lens glass goes anywhere near a camera sensor.
What a clean lens cannot fix
If images are soft all over and cleaning does not change it, the problem is usually elsewhere: shutter speed too slow for the focal length, autofocus landing in the wrong place, or a lens used wide open where it is at its softest. Those are diagnosed in image stabilization explained and autofocus modes explained, and no amount of cleaning will substitute for either.