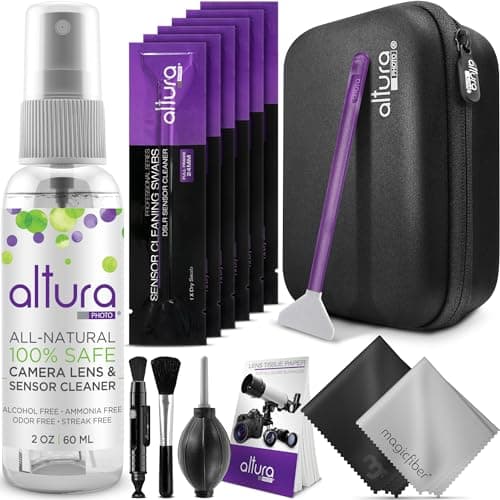
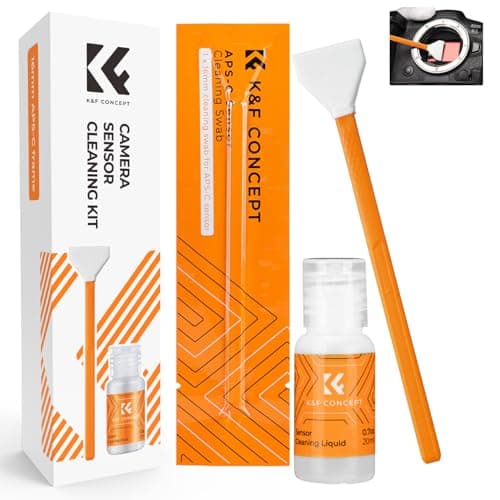
The short answer: run the camera's own sensor-cleaning function first, then use a hand blower, and only if the spots survive both should anything physically touch the sensor — and when it does, it should be a sealed wet swab of the correct width for your sensor, used in a single pass. For the APS-C cameras this site covers, that means 16mm swabs, which is what the K&F Concept APS-C kit ships. Most dust comes off without contact. The risk lives entirely in the contact step, so the whole technique is about postponing it.
First, make sure you are chasing the right problem. Sensor dust shows up as soft grey or dark blobs in the same place in every photo, and it becomes obvious when you shoot something bright and even — a clear sky, a white wall — at a small aperture like f/16. If the marks move between frames, they are not on the sensor. If they only appear at f/16 and vanish at f/2.8, that is classic sensor dust: a small aperture renders the shadow of a dust grain sharply, while a wide one smears it into invisibility.
Here is the diagnostic that takes thirty seconds. Set the camera to aperture priority at f/16, point it at a blank bright surface, defocus completely so you cannot see any detail, and take a frame. Open it and raise the contrast hard. Every dust spot you have will be sitting there in plain sight. Do that again after cleaning and you will know whether you actually improved anything, which is more than most people bother to check.
The order of operations
Step 1 — the camera's own cleaning function. Almost every mirrorless body has a sensor-shake routine in the setup menu that vibrates the filter stack to shed loose particles. It is free, it takes seconds, and it is genuinely effective on fresh dust. Point the camera downwards while you run it so the dust falls out of the chamber instead of resettling, and run it two or three times. Then re-shoot the f/16 test.
Step 2 — air, and only air. With the lens off and the camera facing downwards, squeeze a hand blower across the sensor from a couple of centimetres away. Never use canned or compressed air: the propellant can spit liquid onto the sensor, and the pressure is high enough to drive a grain under the filter edge. Never put the nozzle so deep that it can touch anything, and never use a blower with an unfiltered intake that just recycles the dust you removed. This step clears the large majority of what the shake routine leaves behind.
Step 3 — a dry brush, if you own a proper one. A sensor brush is a specific tool, not a makeup brush. It is static-charged by blowing air through it and then swept once across the sensor to lift particles electrostatically. This step is optional and plenty of people skip straight past it; if you do not own a dedicated sensor brush, do not improvise one.
Step 4 — a wet swab, in one pass. This is the step that actually fixes stuck, welded-on spots, and it is the step with the risk. A sensor swab is a flat paddle of the exact width of your sensor, wrapped in lint-free material, to which you add two or three drops of sensor solution. You lay it flat on one edge, draw it across to the other edge in one steady movement without lifting, flip the swab over, and draw it back. Then you throw the swab away. A swab is single-use, every time — the whole point is that the material contacting your sensor has never touched anything else.
Why swab width is the spec that matters
A swab narrower than your sensor leaves a stripe of grime you then have to go back over, and going back over is where streaks come from. A swab wider than your sensor jams against the chamber walls. Nearly every beginner mirrorless camera — the Sony a6000 series, Canon's R-series crop bodies, Nikon's Z DX line, every Fujifilm X body — has an APS-C sensor, which wants a 16mm swab. Most general cleaning kits ship full-frame swabs at 24mm because that is the one size that fits the professional market, and that is the single most common reason a first sensor clean goes badly. Check the width before you buy, not after.
Which tool does which job
The one rule that matters: lens tools and sensor tools are not interchangeable. Every row below is a product this site already ranks, with the manufacturer-listed contents, so you can see at a glance which surface each one is for.
| Tool | Listed contents | What it removes | Touch a sensor with it? |
|---|
| K&F Concept APS-C Sensor Cleaning Kit | APS-C width swabs (16mm), sensor cleaning solution, individually sealed swabs | Stuck, welded-on spots that air will not shift | Yes — this is the step-4 tool, one pass per swab |
| Altura Photo Camera Cleaning Kit | Blower, brush, microfibre cloths, cleaning solution, full-frame sensor swabs, zippered case | Everything routine, in one box — the blower covers step 2 | Yes, but its swabs are 24mm full-frame width, too wide for APS-C |
| Giottos Rocket Air Blaster | Hand-squeezed blower, one-way intake valve, no propellant | Loose dust, with nothing touching the glass | Yes — air only, from a couple of centimetres, body facing down |
| LensPen NLP-1 | Retractable soft brush, carbon compound cleaning tip, non-liquid | Fingerprints and finger oil on lens and viewfinder glass | Never. Lens and viewfinder glass only |
| Zeiss Pre-Moistened Lens Wipes | 200 individually wrapped, pre-moistened, ammonia-free wipes | Smears and greasy marks on lens and screen glass | Never. Wipes are for lens and screen glass |
The blower is not ranked below for one reason: its listing currently has no buyable offer, and we do not put a buy button on something you cannot buy. The Altura kit includes one, and the full ranking is on best camera cleaning kits.
When to leave it alone, and when to pay someone
Three honest exceptions to all of the above. If the spots only show up at f/16 and never at the apertures you actually shoot, you can reasonably ignore them and remove them in one click in your editor — a healing brush on a fixed spot is thirty seconds of work per image, and software now does it automatically across a batch. If you see a streakrather than a spot, that is oil or lubricant rather than dust, and it usually needs more than one swab pass. And if the marks survive two careful swab passes, stop: something is either under the filter stack or on the stack's underside, and neither is a home job. A professional clean costs less than a lens and far less than a sensor assembly.
What never to put near a sensor
Canned or compressed air, because of the propellant and the pressure. A LensPen or any carbon cleaning tip — those are designed for lens and viewfinder glass, not for sensors. Household glass cleaner, alcohol wipes, eyeglass cloths, cotton buds, a shirt, or your breath. Anything that has been loose in a bag is also out, because it has collected grit and grit is what scratches coatings. The camera cleaning kit ranking explains which tool is for which surface, and the distinction between lens tools and sensor tools is not a technicality.
How to clean a sensor without a kit
You can do steps one and two with nothing but the camera and a blower, and that genuinely solves most dust. What you cannot safely do without the right kit is the wet pass — there is no household substitute for a sealed, correctly sized swab and sensor-grade solution, and improvising one is how people turn a dust spot into a scratch. If the first two steps have not fixed it and you do not own swabs, the choice is buy the swabs or book a clean, not improvise.
How to stop it coming back
Dust gets in during lens changes, and mirrorless bodies are more exposed than DSLRs because there is no mirror in front of the sensor. Four habits do almost all the preventive work: switch the camera off before changing a lens so the sensor is not electrostatically charged; point the body downwards while the mount is open so gravity works for you; have the replacement lens out of the bag with its cap off before you start, so the mount is open for two seconds rather than twenty; and never change a lens in wind without turning your back to it. Caps on both ends of every lens in the bag matters too — a rear cap left off is a dust source you carry around with you.
One more habit worth having: if you keep your kit in a bag with fabric dividers, vacuum the inside of it occasionally. A camera bag is a dust reservoir, and a sensor you cleaned on Monday is breathing that reservoir on Tuesday.
Does sensor cleaning void a warranty?
User sensor cleaning is a documented, manufacturer-supported operation — every manual has a section on it, which is why the camera has the shake routine in its menu in the first place. What is not covered is damage you cause, and that is the real reason to follow the sequence above rather than skip to the swab. Nobody voids a warranty by blowing dust off a sensor; people damage filter coatings by dragging grit across them.