If you do one thing: put a single large, soft light slightly above your eye line and about 45 degrees off to one side of the camera, then bounce a little light back into the shadow side with anything white. That is 80% of good-looking YouTube lighting, and the full three-point setup is only a refinement of it. A Godox SL60IID with a softbox is the cheapest version of that single light that looks genuinely professional, and the Neewer two-panel kit is the fastest way to get a key and a fill out of one box with stands included.
The reason lighting matters so much more than camera specs is that a camera sensor is just a light-measuring device. Give a $600 body plenty of soft light and it produces a clean, sharp, pleasant image. Give a $3,000 body a dim room lit by a ceiling bulb and it produces a noisy image with a shadow under your eyebrows and an orange cast on one cheek. Viewers do not notice resolution. They notice whether your face looks like it belongs in the room.
The three-point lighting setup, and what each light is for
Three-point lighting is the convention almost all film and television uses, and once you know what each light does you can decide which ones you actually need.
The key light is your main light and the only one that is not optional. It sets the exposure and it decides where the shadows fall. Put it slightly above your eye line, angled down a little, and 30 to 45 degrees off to one side of the camera. Above eye line matters because it puts the shadow of your nose downwards rather than up your face, and it creates a catchlight in the eye that makes a face look alive. Off to one side matters because that is what gives a face shape — a light directly beside the lens flattens everything out.
The fill light sits roughly opposite the key, on the other side of the camera, and its only job is to lift the shadow side so it does not go completely black. It should be clearly dimmer than the key, not equal to it — if the two are the same brightness you get a flat, shadowless face, which is the look of a bad video call. Critically, the fill does not have to be a light at all. A sheet of white foam board, a white wall, or a reflector catches spill from your key and bounces it back, and it costs nothing.
The back light— also called a hair light or rim light — goes behind you, pointed at the back of your head and shoulders. It does nothing for your face. What it does is draw a thin bright edge around you that separates you from the background, which is the single most "produced" looking thing in the whole setup. It is also the easiest light to improvise, because it can be small and does not need to be soft. A pocket RGB light on a shelf behind you is enough.
The one-light setup that beats most three-light setups
Three lights badly placed look worse than one light placed well, and most home studios should start with one. Take your key light, make it as big as you can afford (softbox, umbrella, or a panel bounced off a white wall), put it at 45 degrees and slightly high, and put a sheet of white card on the opposite side just out of frame. That is a key and a fill. Add a cheap light behind you later, when the rest is working. The money you did not spend on lights two and three should go into making light one bigger — which brings us to the only other concept that matters.
Soft or hard: it is about size, not brand
"Soft" light has gradual shadow edges and is flattering on skin. "Hard" light has sharp shadow edges and shows every texture. The only thing that decides which you get is how big the light source is relative to your face, from where you are sitting. A bare bulb two metres away is tiny and therefore hard. The same bulb inside a 90cm softbox one metre away is enormous and therefore soft. This is why a COB light on a Bowens mount is such good value for a creator: the mount accepts cheap softboxes and umbrellas, so a modest light becomes a large source for very little extra money. A flat panel is a fixed size forever.
What each light is for, side by side
Every spec below is manufacturer-published and linked in Sources. The last column is the one to read: these lights are not competing for the same slot in a three-point setup.
| Light | Type and color | Modifier mount | Power | Its job in the setup |
|---|
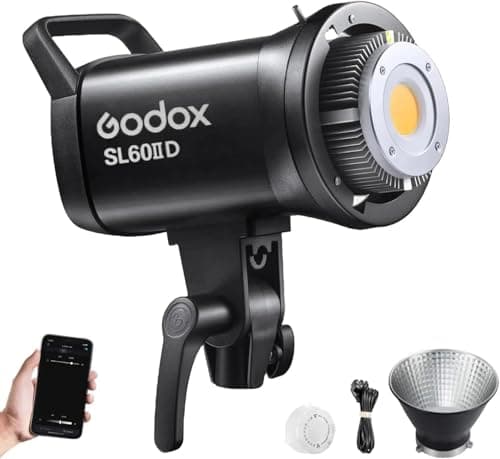
| Godox SL60IID | 70W daylight COB, 5600K ±200K, CRI 96 / TLCI 97 | Bowens | Mains | Key light, through a softbox |
| Aputure amaran 100x S | 100W bi-color COB, 2700-6500K | Bowens | Mains | Key light where you must match a room light |
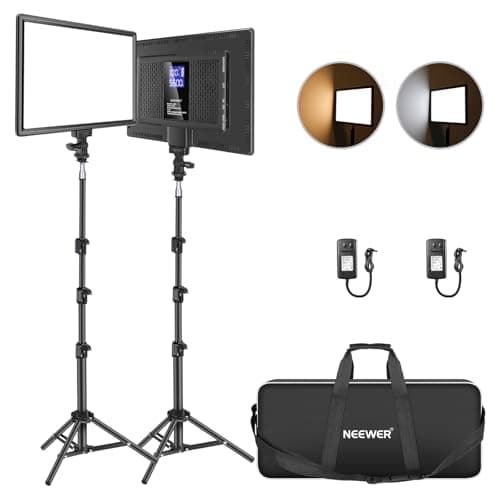
| Neewer 13in LED Panel Kit (2-Pack) | Two bi-color panels, 3200-5600K, high CRI | None (bare panel) | Built-in 4000mAh batteries | Key and fill together, stands included |
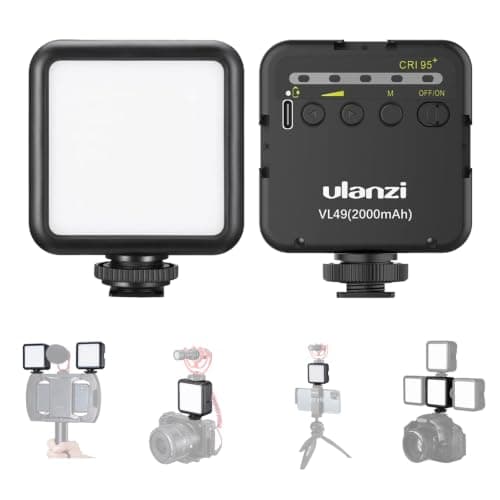
| Ulanzi VL49 On-Camera Light | 49-LED panel, 5500K daylight | None | Built-in 2000mAh, USB-C | On-camera fill and a catchlight, close subjects only |
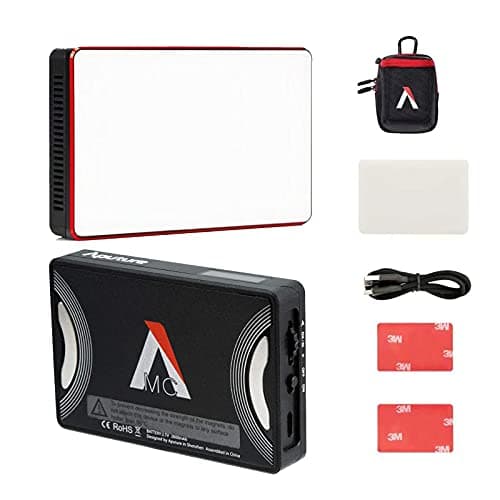
| Aputure Amaran MC | Pocket RGBWW, 3200-6500K plus full color | None | USB-C rechargeable | Back/rim light, or a color wash on the wall |
Note what the table does not have: a column for brightness as the deciding spec. For a face a metre away, every light here has enough output — what separates them is whether you can make the source big, which is the mount column. Full scores are on best lighting for video.
The short answer
Quick picks
| # | Product | Best for | Score | Price |
|---|
| 01 | Godox SL60IIDThe classic first studio light, a generation on. A 70W daylight COB on a universal Bowens mount, now with published CRI 96 color, app control and a quieter fan than the SL60W it replaced. | The best first studio key light | | $139.00·Amazon |
| 02 | Neewer 13in LED Panel Kit (2-Pack)The do-it-all lighting kit. Two bicolor panels with stands and built-in batteries — enough to set up a key-and-fill in minutes, indoors or out, straight from one box. | The best two-light starter kit | | $118.99·Amazon |
| 03 | Ulanzi VL49 On-Camera LightThe cheapest useful light. A tiny daylight panel that clips to the hot shoe for a bit of fill on faces and products, for pocket-money price. | The cheapest on-camera fill | | $16.99·Amazon |
| 04 | Aputure Amaran MCThe pocket problem-solver. A palm-sized RGB light that adds a pop of color, a catchlight or a hair light anywhere, charges over USB-C and sticks to metal with a magnet. | The best pocket RGB accent light | | $76.00·Amazon |
#ad · Live prices from the Amazon Product API, as of October 10, 2026. Where we have no verified live price, we show none — we would rather leave a gap than print a number that has rotted.
In detail
The picks, in full
The best first studio key light
Godox SL60IID
70W daylight COB (5600K ±200K)18,600 lux at 1mCRI 96 / TLCI 97Bowens mount + Bluetooth app control
The classic first studio light, a generation on. A 70W daylight COB on a universal Bowens mount, now with published CRI 96 color, app control and a quieter fan than the SL60W it replaced.
- Output
- 9
- Color quality
- 9
- Control
- 9
- Portability
- 5
- Value
- 8
Pros
- +Real output for a home studio — far brighter than any on-camera panel, enough to light a face or a set cleanly
- +Published CRI 96 / TLCI 97 color accuracy is the clearest gain over the older SL60W, and it is the spec that keeps skin tones honest
- +The universal Bowens mount opens up cheap softboxes, umbrellas and grids, with Bluetooth app control and eight built-in effects included
Cons
- −Single-color daylight only — no warm-to-cool bicolor control and no RGB
- −Needs mains power, a stand and ideally a modifier to look its best, so it is a fixed rather than portable tool
Don't buy this if…
…you want on-camera portability or adjustable color temperature. A pocket light like the Amaran MC or Ulanzi VL49, or a bicolor panel kit, travels far better.
The best two-light starter kit
Neewer 13in LED Panel Kit (2-Pack)
Two bicolor panels + light stands3200-5600K, high CRIBuilt-in 4000mAh batteriesOn-panel dimming, 0-100%
The do-it-all lighting kit. Two bicolor panels with stands and built-in batteries — enough to set up a key-and-fill in minutes, indoors or out, straight from one box.
- Output
- 7
- Color quality
- 8
- Control
- 8
- Portability
- 7
- Value
- 9
Pros
- +Two lights plus stands in one box makes a proper key-and-fill setup affordable from day one
- +Bicolor and fully dimmable, so you can match any room's color and brightness
- +Built-in batteries let you shoot on location away from wall power
Cons
- −Flat panels give soft, even light but less punch than a COB with a softbox
- −The plastic panels and stands are functional rather than sturdy
Don't buy this if…
…you want maximum output and modifier flexibility for a fixed studio. A COB like the Godox or Aputure with a softbox hits harder and shapes light better.
The cheapest on-camera fill
Ulanzi VL49 On-Camera Light
49-LED on-camera panel (5500K)Built-in 2000mAh battery (USB-C)Cold-shoe + 1/4in mountsPocket-size
The cheapest useful light. A tiny daylight panel that clips to the hot shoe for a bit of fill on faces and products, for pocket-money price.
- Output
- 4
- Color quality
- 6
- Control
- 6
- Portability
- 10
- Value
- 10
Pros
- +Costs almost nothing yet visibly lifts shadows on close subjects and adds a catchlight
- +Small and light enough to live permanently in any camera bag
- +Rechargeable over USB-C, so no disposable batteries
Cons
- −Single-color daylight and modest output — it is a fill, not a key
- −Simple build and basic stepless dimming
Don't buy this if…
…you need real output, color control, or to light a whole scene. Even a single COB or a bicolor panel is a large step up.
The best pocket RGB accent light
Aputure Amaran MC
Pocket RGBWW LED (3200-6500K + full color)USB-C rechargeableApp + built-in effectsMagnetic back, palm-sized
The pocket problem-solver. A palm-sized RGB light that adds a pop of color, a catchlight or a hair light anywhere, charges over USB-C and sticks to metal with a magnet.
- Output
- 5
- Color quality
- 9
- Control
- 9
- Portability
- 10
- Value
- 8
Pros
- +Full RGB plus tunable white in something that genuinely fits a pocket
- +The magnetic back and app control make creative color accents and catchlights effortless
- +USB-C rechargeable, so there are no spare batteries to buy or carry
Cons
- −Low output on its own — it is an accent or fill light, not a key for a whole scene
- −You will want two or three of them for bigger setups
Don't buy this if…
…you need a main key light to properly light a face or product. Pair it with, or choose, a COB like the Godox SL60IID or Aputure 100x S.
The window is a free key light — until it is not
A north-facing window on an overcast day is one of the best soft lights in existence and it is free. Sit facing it, slightly off to one side, with the camera between you and the glass, and you have a professional key light for nothing. Two problems follow. First, it changes: cloud cover, time of day and season all move your exposure and your color temperature around, which makes a series of videos look inconsistent. Second, it fights your artificial lights — a 6500K window and a 2700K lamp in the same frame gives you a blue cheek and an orange cheek, and no white balance setting fixes both at once.
The practical answer is to pick one or the other. Either shoot entirely on window light and accept that you film when the weather lets you, or close the curtains and control everything. If you want both, a bi-color light you can dial to match the window is the tool that makes it work, which is the main argument for paying more than the daylight-only option.
What to buy at each budget
Under $25. The Ulanzi VL49 is not going to light a room, and we are not pretending otherwise. What it does is sit in the hot shoe and put a small amount of fill and a catchlight on a face that is close to the camera, which is a visible improvement on nothing at all. Buy it as a travel or on-the-go light, not as your studio key.
Around $120. The Neewer two-panel kit is the sensible first purchase for most people, because the stands are in the box. Two bi-color panels with built-in batteries give you a key and a fill in minutes, indoors or on location, and nothing else to buy. The compromise is that flat panels are a fixed size, so you cannot grow the source — they are soft-ish rather than soft.
Around $140-200. A single COB — the Godox SL60IID, or the bi-color Aputure amaran 100x S if your room has lights you cannot switch off — plus a cheap Bowens softbox and a stand. This is the setup that stops looking like home video. The Godox publishes CRI 96 / TLCI 97 color accuracy, which is the spec that keeps skin tones honest, and the Bowens mount means the softbox you buy today fits the brighter light you buy in three years.
Add later. A pocket RGB light like the Amaran MC behind you as a rim light or aimed at the back wall for a wash of color. It is the cheapest thing on this list that changes how produced a frame looks, and it is deliberately ranked last because it is useless as a key. The full ranking of all of these, scored against each other, is on our best lighting for video page. If you are lighting objects rather than yourself, the criteria change — see best lights for product photography.
The five mistakes that make home video look amateur
The overhead bulb, on. A ceiling light directly above you puts your eyes in shadow and your nose shadow across your mouth. Turn it off before you add anything. The light behind the camera, dead centre. Flat, shadowless, and it makes a face look pasted on. Move it 45 degrees. A coloured wall right behind you. A green or red wall bounces its colour onto the back of your neck and no white balance recovers it cleanly — move further from the wall, or light the wall deliberately with its own light. Mixed colour temperature, covered above. And a window directly behind you, which makes the camera expose for the window and turn you into a silhouette.
Set your white balance manually
Auto white balance drifts the moment anything in the frame changes, which produces footage whose colour shifts mid-sentence and is miserable to grade. Once your lights are set, put the camera on a manual white balance that matches them — 5600K for daylight-balanced lights, 3200K for warm — and leave it. This costs nothing and is one of the two or three settings that most separate footage that looks deliberate from footage that looks automatic. Our camera settings for video guide walks through the rest of them, and the YouTube starter kit covers what else belongs in the room besides lights.
How we picked
We do not run a testing lab
We compiled the manufacturers' published specifications and manuals, did the cost math, and scored each product against a published rubric. The scores are judgments from that documented research — they are notmeasurements we took, because we do not have a lab and we are not going to pretend we do. Where a number came from someone else's testing, we name and link them in Sources.
Questions
Frequently asked
What is three-point lighting?+
A key light as your main source, placed slightly above eye line and 30-45 degrees off to one side; a dimmer fill light opposite it to stop the shadow side going black; and a back light behind you to draw a bright edge around your head and separate you from the background. The key is the only one that is not optional - the fill can be a sheet of white card, and the back light can be any small light.
How many lights do I need for YouTube?+
One, properly placed and made as large as you can afford, plus something white to bounce fill. Three badly placed lights look worse than one good one. Add a back light once the key is working, and only then consider a real fill light rather than a reflector.
Where should I put my light for a talking-head video?+
Slightly above your eye line, angled down a little, and 30 to 45 degrees off to one side of the camera. Above eye line drops the nose shadow downwards and puts a catchlight in your eyes; off-axis gives the face shape. Directly beside the lens is flat, and below eye line looks like a horror film.
Is window light good enough for YouTube videos?+
A north-facing window on an overcast day is an excellent, free soft light - sit facing it, slightly off-axis, with the camera between you and the glass. The two catches are consistency, because weather and time of day change your exposure and colour, and mixing, because a daylight window fighting a warm lamp gives you one blue cheek and one orange cheek.
What is the cheapest lighting setup that looks professional?+
A single COB light such as the Godox SL60IID, a cheap Bowens-mount softbox, a light stand, and a sheet of white foam board as a reflector. That combination is the point at which home video stops looking like home video, and the softbox you buy with it will still fit a brighter light years later.
Should I use a ring light?+
A ring light puts flat, even, shadowless light on a face from the camera position, which is fine for a video call and unflattering for video that is meant to look produced. It gives you no shaping at all and a distinctive circular catchlight. If you already own one, use it as a fill off to one side rather than as your key.
Why does my face look orange on one side and blue on the other?+
Mixed colour temperature: a daylight-balanced source on one side and a warm household bulb or window on the other. White balance is a single global setting, so it cannot correct both at once. Switch off everything that does not match your key, or use a bi-color light dialled to match whatever you cannot switch off.
Do I need a softbox, or will the light's own diffuser do?+
You want the softbox. Softness is purely a function of how big the source is relative to your face, and the small frosted panel on the front of a light barely changes its size. A 60-90cm softbox on a Bowens-mount COB typically costs a fraction of the light and is the most visible single upgrade available.
Receipts
Sources
We do not run a testing lab, and we do not pretend to. Specs come from manufacturer sheets and manuals; where a figure came from someone else's measurement, we name and link them. Where we could not verify something, we say so on the page rather than quietly leaving it out. Read our full method.